
Your Portfolio With Manablox · Part 7 of 7 in the series
Part 7: Put Your Portfolio Online
Rent a server, point your domain at it, and run the CMS, the public API and your Astro site there with Docker and automatic HTTPS.
Quest objectives
- Know what runs where on a production server
- Point a domain at a server with DNS records
- Package the Astro site as a Docker image
- Start everything with Docker Compose and Caddy
- Move your content from your computer to the server
Your portfolio works on your computer. Now it moves to a server, so everyone can reach it. On the server, six programs run side by side, each in its own Docker container:
the CMS with the admin, at
cms.robin.example,the public API, at
api.robin.example,your Astro site, at
robin.example,the site process from part 2, in case you switch back to a designed site,
Valkey, the cache from part 1,
and Caddy, a web server in front of all of them. It sends every visitor to the right program and gets HTTPS certificates by itself, so your site has the lock in the address bar.
Replace robin.example with your domain and 203.0.113.10 with the address of your server everywhere in this part.
What you need
A server: a small virtual server (VPS) with Ubuntu 24.04 and at least 2 GB of memory. Every hosting company offers one, for a few euros a month. You get its IP address and a password or SSH key for the user
root.A domain, such as
robin.example, from any domain registrar.
Point your domain at the server
DNS is the internet's address book: it turns robin.example into the IP address of your server. In the DNS settings of your registrar, add three A records:
Type   Name                Value
A      robin.example       203.0.113.10
A      cms.robin.example   203.0.113.10
A api.robin.example 203.0.113.10Create the server project
The project from part 1 runs the CMS on your computer with pnpm dev. For the server, the CLI writes a second project in which everything runs in containers. Run this on your computer, in your projects folder, with your domain and email address:
$ pnpm dlx @manablox/cli create portfolio-server --preset docker --proxy caddy --database sqlite --website --admin-domain cms.robin.example --public-domain api.robin.example --acme-email robin@example.com --yesWriting portfolio-serverWrote 19 files to portfolio-serverInstalling dependencies with pnpmDependencies installedInitialised a git repository
--preset dockerputs every process into a container, with aDockerfileand acompose.ymlthat ties them together.--proxy caddyputs Caddy in front, with automatic certificates.--admin-domainand--public-domainare the addresses of the admin and the public API.--acme-emailis where the certificate authority, Let's Encrypt, writes if a certificate ever needs your attention.--database sqliteand--websitematch your project from part 1, so your content fits in.
The secrets in portfolio-server/.env were generated fresh for the server. Never share that file.
Add your Astro site
Copy the site into the server project, as the folder web, without the installed packages and the old build:
$ cp -r my-site portfolio-server/web$ rm -rf portfolio-server/web/node_modules portfolio-server/web/dist portfolio-server/web/.git
A Dockerfile is the recipe for a container image. This one builds your site in a first step and copies only what it needs to run into a second, smaller image. Create web/Dockerfile:
# The portfolio: build the Astro site, then run its Node server.
FROM node:24-bookworm-slim AS build
WORKDIR /app
RUN corepack enable
ENV CI=true
COPY package.json pnpm-lock.yaml pnpm-workspace.yaml ./
RUN pnpm install --frozen-lockfile
COPY . .
RUN pnpm build

FROM node:24-bookworm-slim
WORKDIR /app
ENV NODE_ENV=production HOST=0.0.0.0 PORT=3005
COPY --from=build /app/node_modules ./node_modules
COPY --from=build /app/dist ./dist
COPY --from=build /app/package.json ./
USER node
EXPOSE 3005
CMD ["node", "./dist/server/entry.mjs"]
The .dockerignore next to it keeps the files out of the image that are made inside it anyway:
node_modules
dist
.astro
.env
The CMS image is built from the whole server folder, so tell it to leave your site out. Add one line at the end of portfolio-server/.dockerignore:
webAdd the site to Docker Compose
compose.yml lists the containers. Add your site as a new service, right above caddy:. Inside the compose network, the containers reach each other by their service names, so the site reads from http://public:3100:
# The portfolio itself: the Astro site in web/. It reads the content from the public
  # API over the compose network.
  web:
    build: ./web
    restart: unless-stopped
    <<: *logging
    depends_on:
      - public
    environment:
      MANABLOX_URL: http://public:3100
      MANABLOX_ADMIN_ORIGIN: ${PUBLIC_URL:?set PUBLIC_URL}
In the caddy service below it, add web to depends_on and pass the new domain on:
caddy:
    # ...
    depends_on:
      - api
      - public
      - web
      # ...
    environment:
      ADMIN_DOMAIN: ${ADMIN_DOMAIN:?set ADMIN_DOMAIN}
      SITE_DOMAIN: ${SITE_DOMAIN:?set SITE_DOMAIN}
      # ...
Then tell Caddy where your site lives. In caddy/Caddyfile, add this block above the line # manablox:slot caddy.sites:
# The portfolio, the Astro site in web/.
{$SITE_DOMAIN} {
	import hardening
	reverse_proxy web:3005
}
And give the domain a value in .env, next to PUBLIC_DOMAIN:
# The portfolio, the Astro site in web/.
SITE_DOMAIN=robin.example
Upload and start
rsync copies the folder to the server and leaves out what the images build themselves:
$ rsync -av --exclude node_modules --exclude dist --exclude .git portfolio-server/ root@203.0.113.10:/opt/portfolio/Then log in to the server with ssh, install Docker with its official script, and start everything. The first build takes a few minutes.
$ ssh root@203.0.113.10$ curl -fsSL https://get.docker.com | sh$ cd /opt/portfolio$ docker compose up -d --build Image portfolio-server:latest Built Image portfolio-server-web Built Container portfolio-server-valkey-1 Healthy Container portfolio-server-api-1 Started Container portfolio-server-public-1 Started Container portfolio-server-site-1 Started Container portfolio-server-web-1 Started Container portfolio-server-caddy-1 Started
Move your content
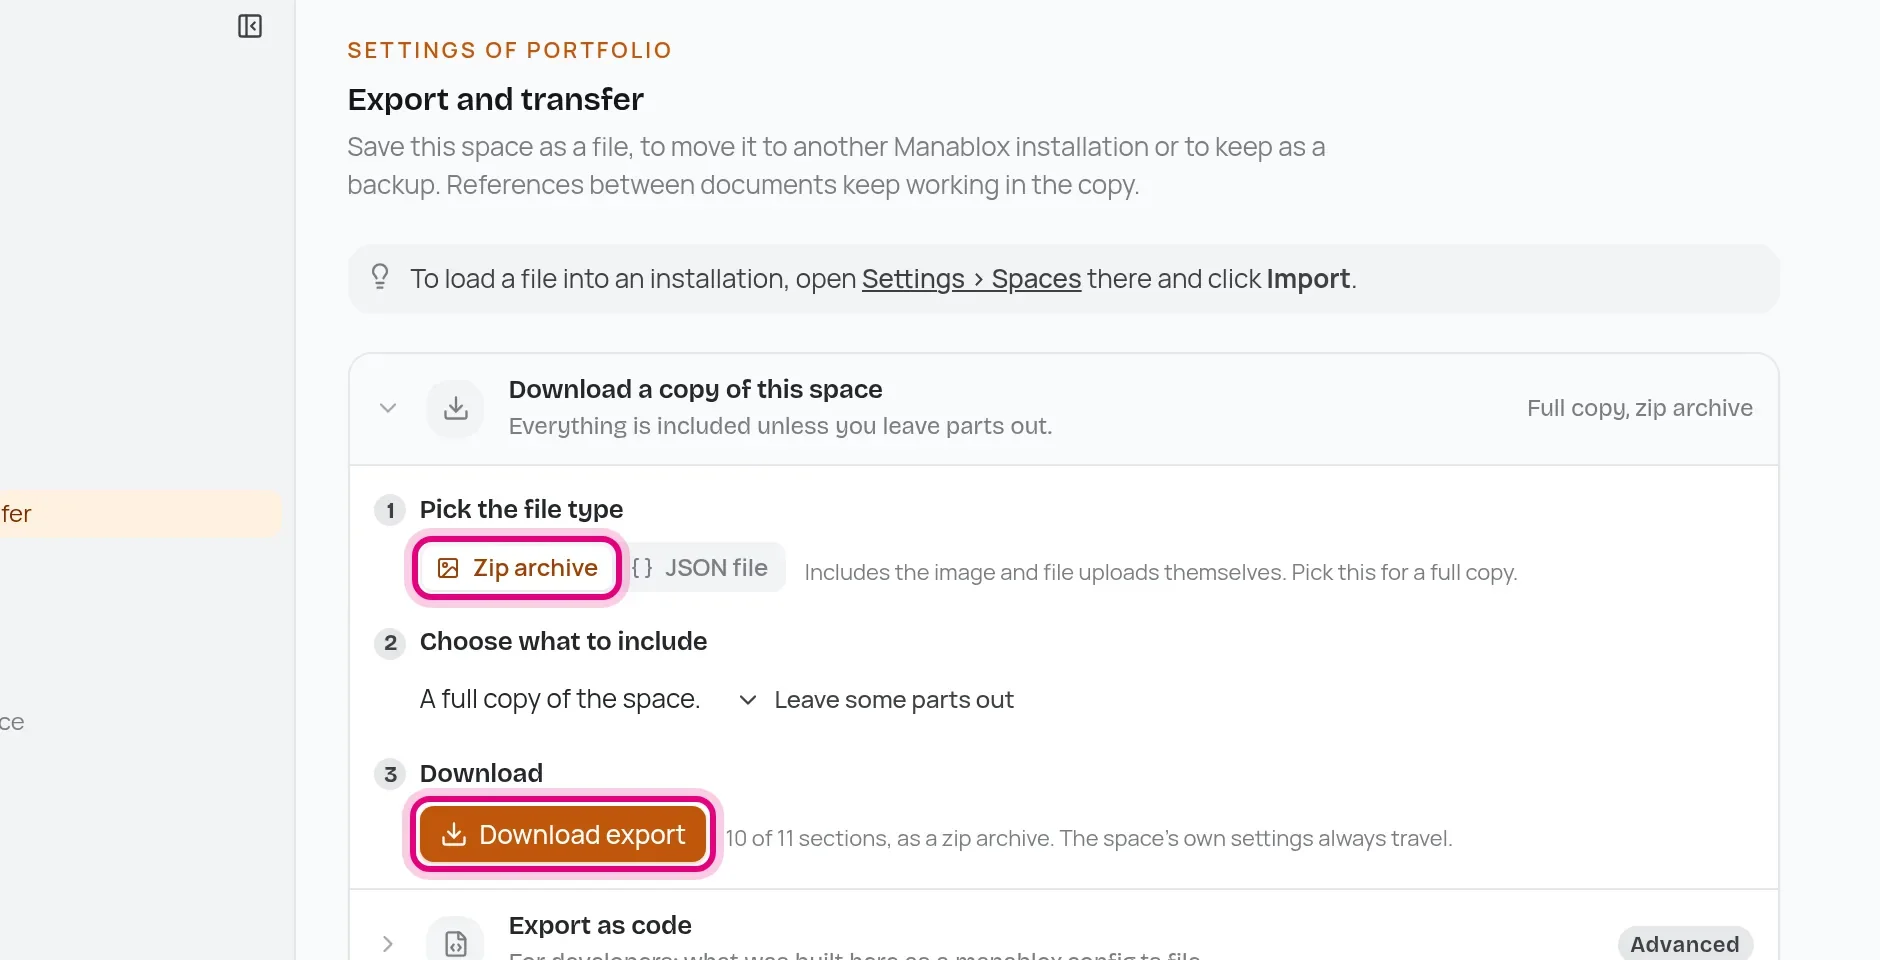
The server has an empty CMS. Your content is on your computer, so you take it along as an export. In your local admin at localhost:3000, open Settings → Export and transfer, choose Zip archive, which also carries the pictures, and click Download export.
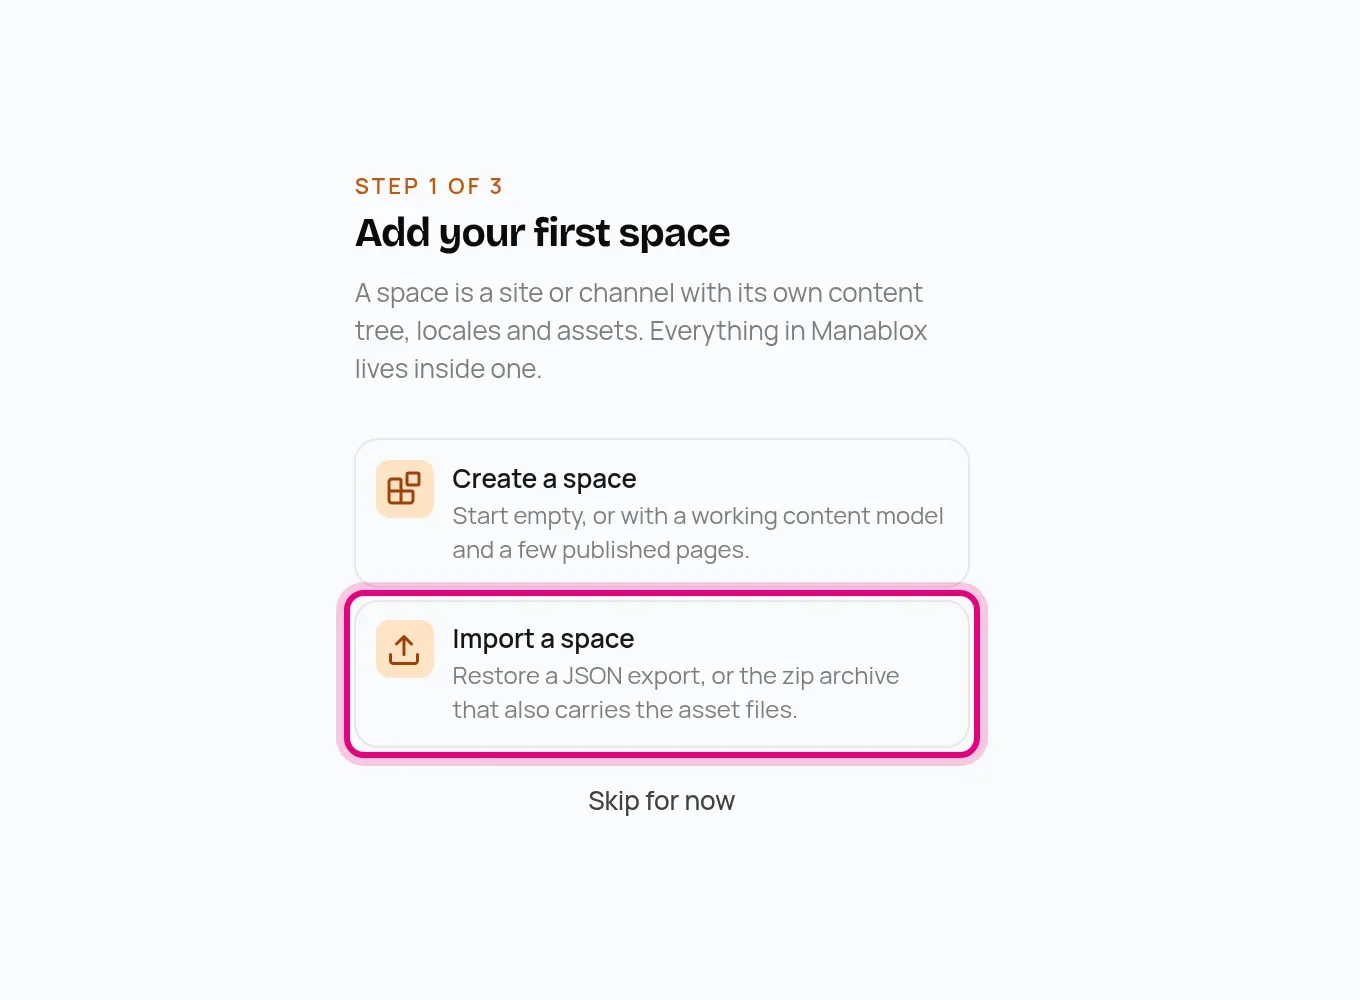
Now open https://cms.robin.example. The server greets you with the same setup assistant as in part 1. Create your account, with a new, strong password, and then choose Import a space instead of creating one.
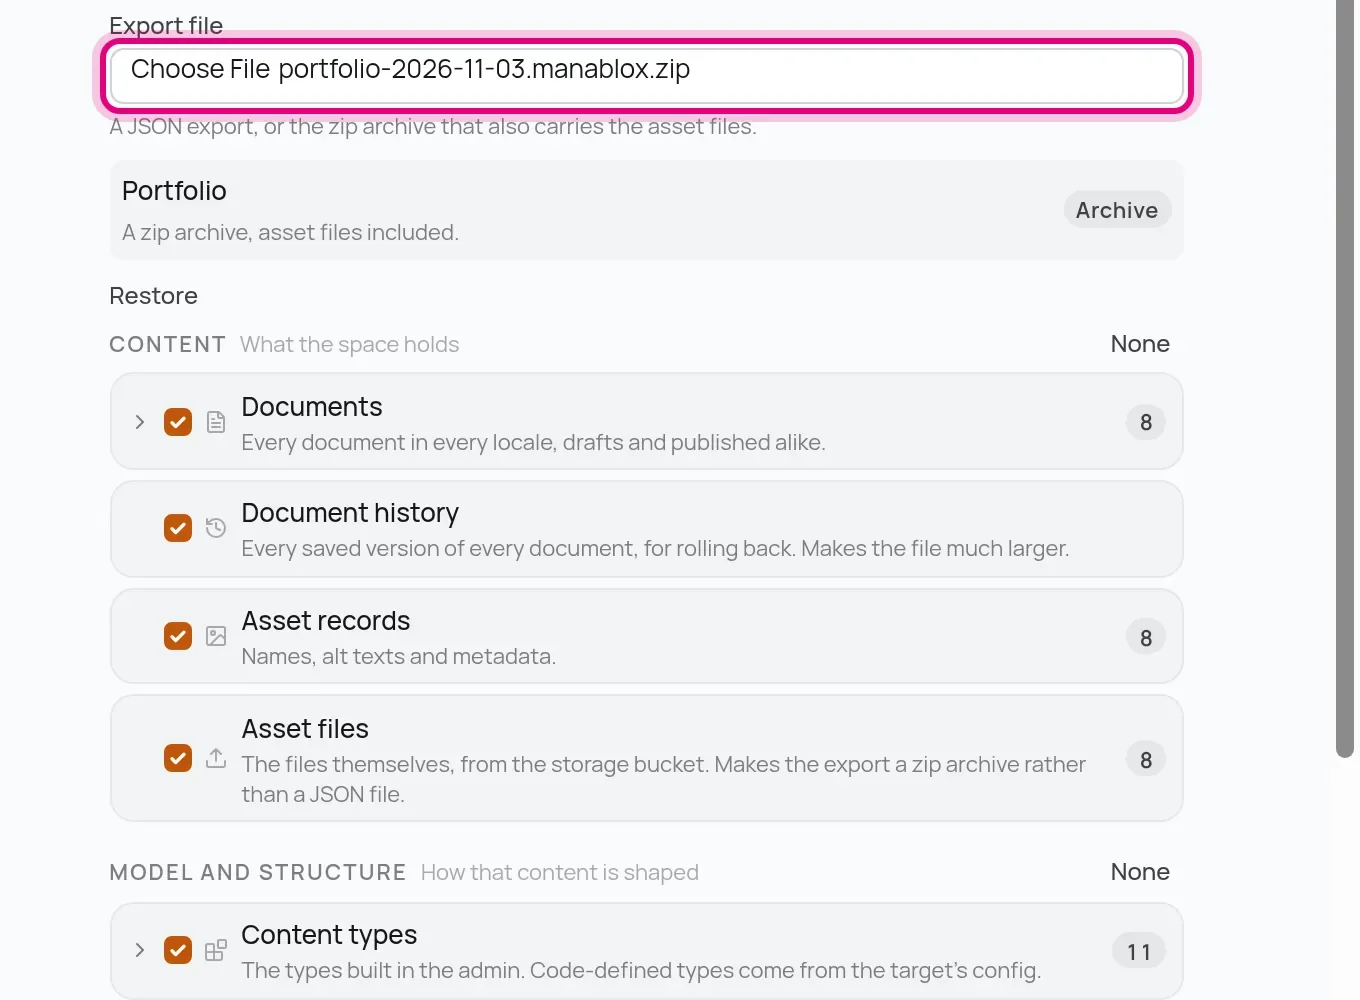
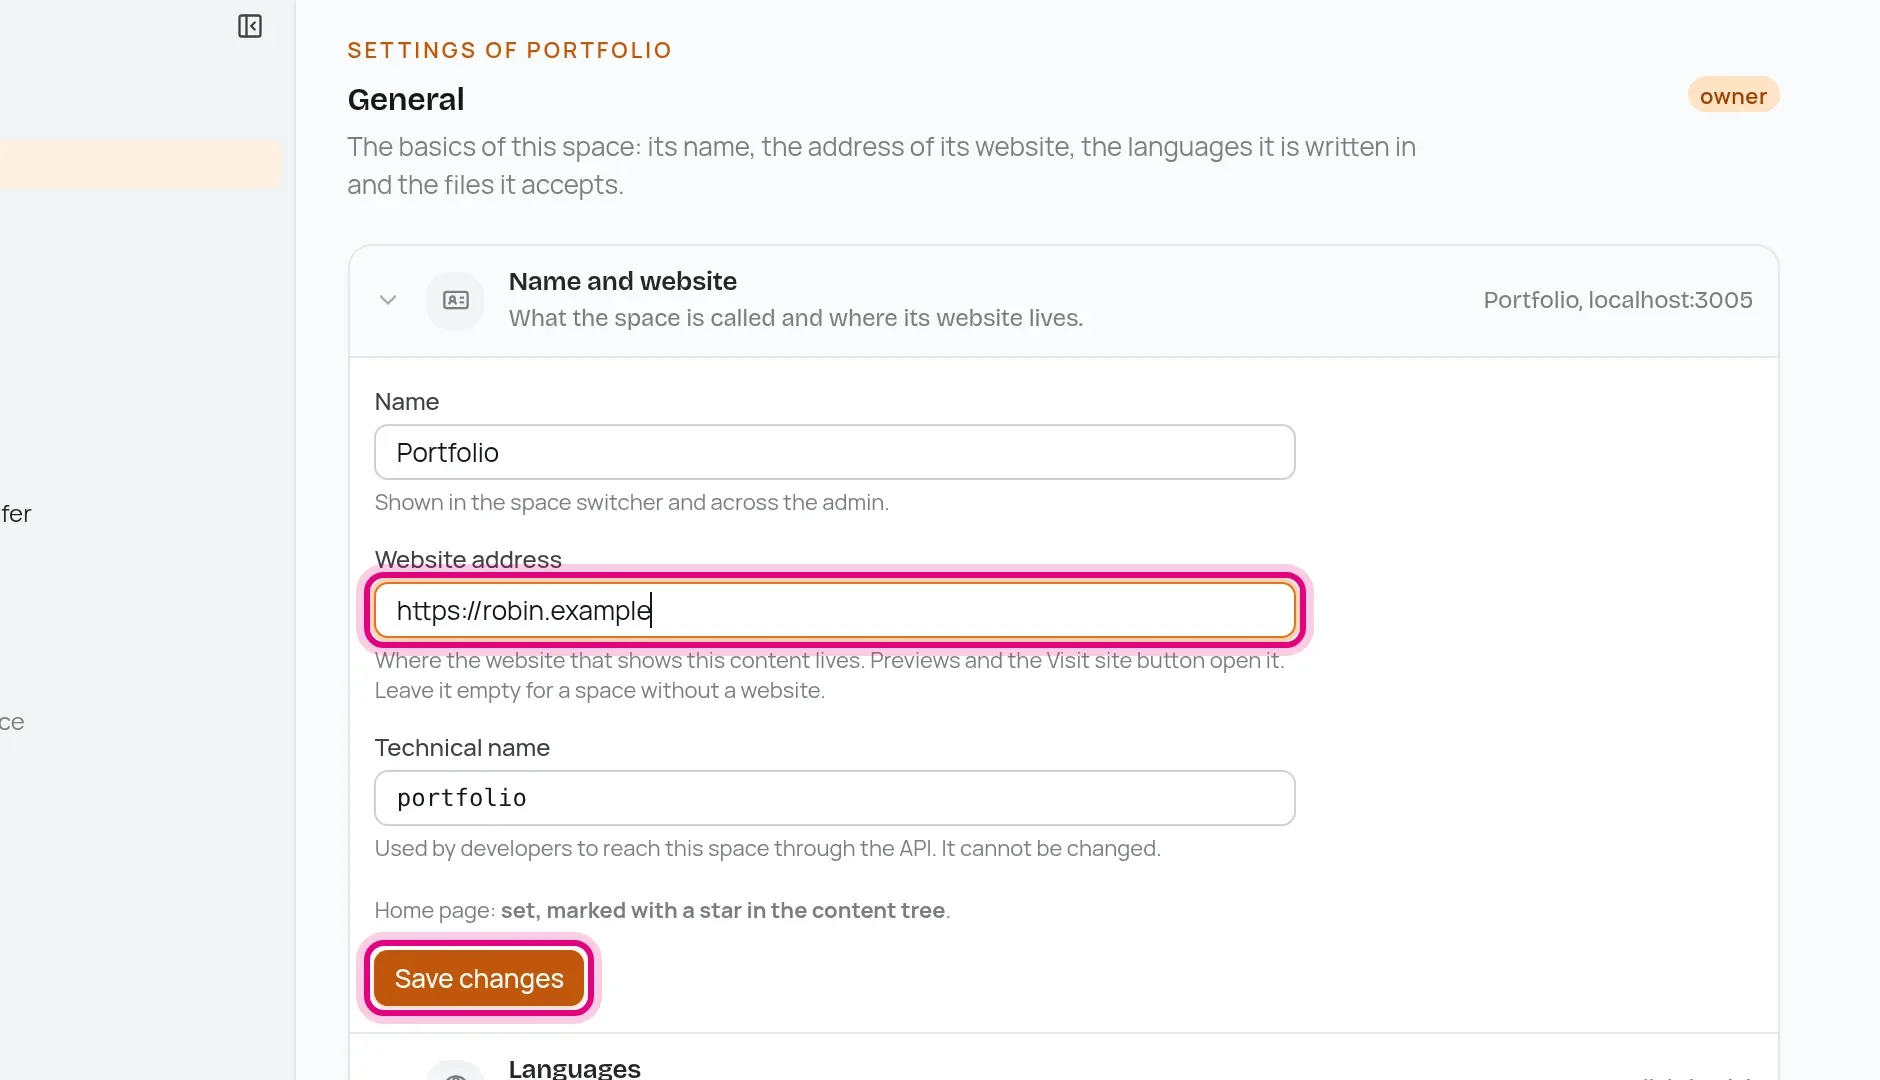
The import still has the website address from your computer. Open Settings, change the Website address to https://robin.example and save. The Visual button then frames the live site.
Online
Open https://robin.example. Your portfolio is on the internet, with HTTPS, your content and your pictures, which now come from api.robin.example. Share the link, and the previews show your covers.
Changing things later
Content you change in the admin at cms.robin.example, and it is live as soon as you publish. Your computer's CMS was only the workshop.
Code you change on your computer, in my-site. When you are happy, copy the changed files into portfolio-server/web, upload, and rebuild:
$ rsync -av --exclude node_modules --exclude dist --exclude .git portfolio-server/ root@203.0.113.10:/opt/portfolio/$ ssh root@203.0.113.10 "cd /opt/portfolio && docker compose up -d --build"
That is the whole journey: from an empty folder to a CMS, a designed site, your own Astro frontend and a portfolio on the internet. Congratulations! Keep adding projects, and when you outgrow the blocks you have, add new block types in the admin and a component for each, just like the contact button.